基于uniCloud的简易备忘录
1 开发准备
- 创建项目前必须登录HBuilde X账号,如下

- 关联云服务空间
注册阿里云账户并实名制,如果不实名制将不可以关联云服务空间。
2 创建uniCloud项目
2.1 新建项目
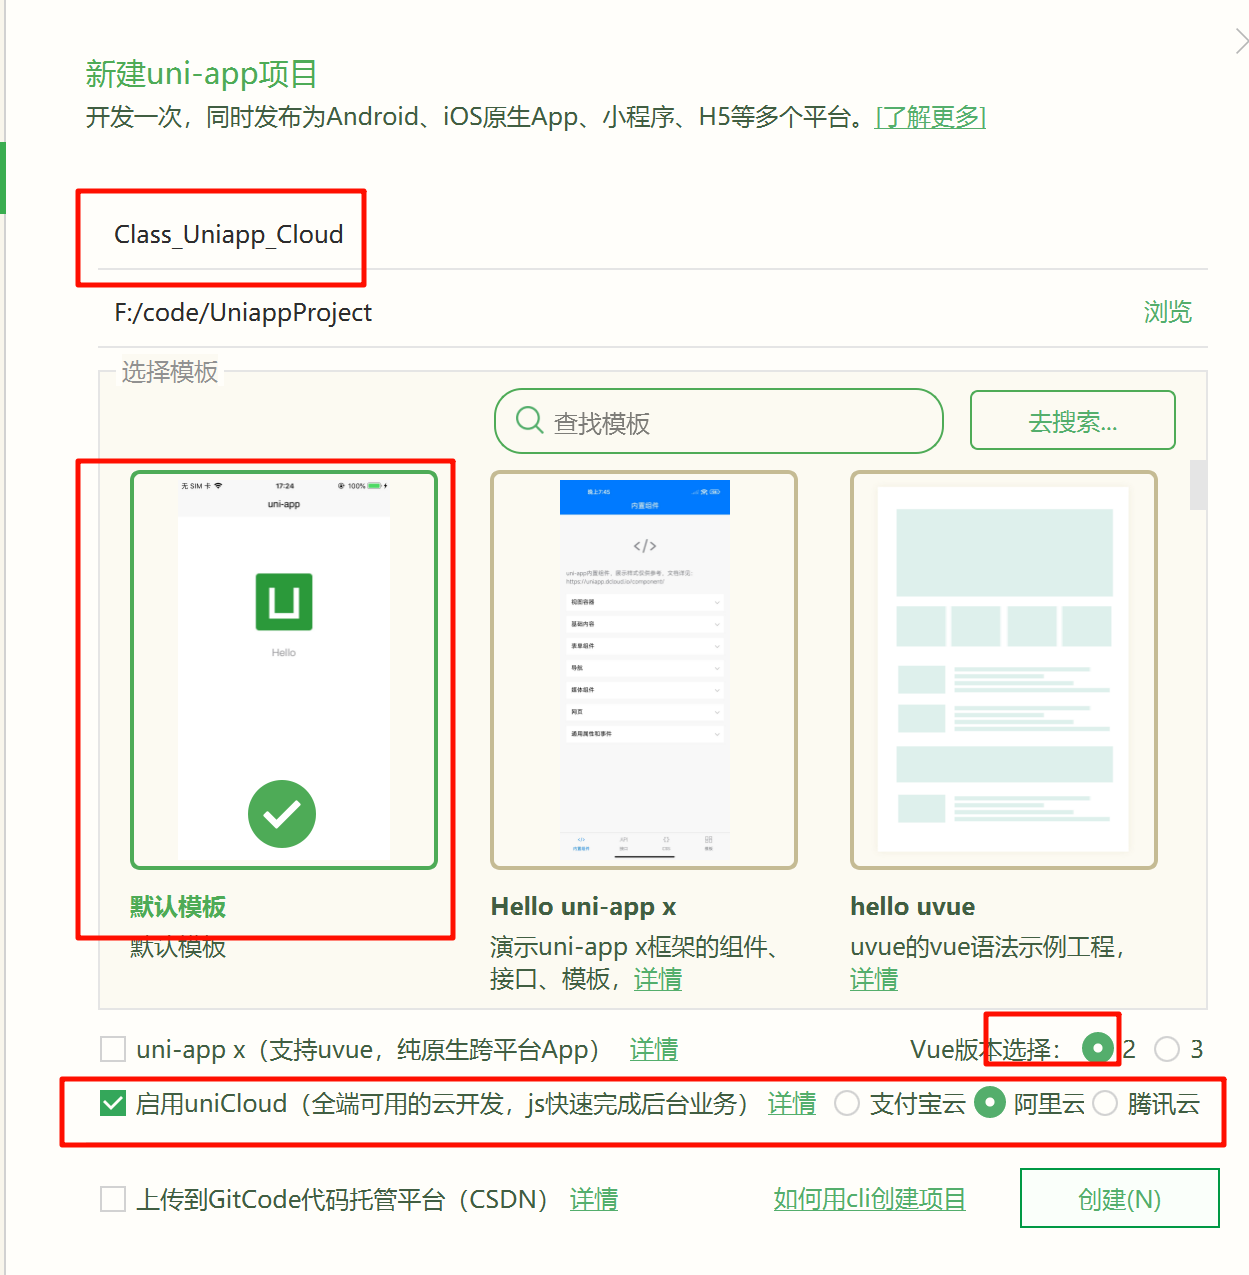
2.2 云空间创建
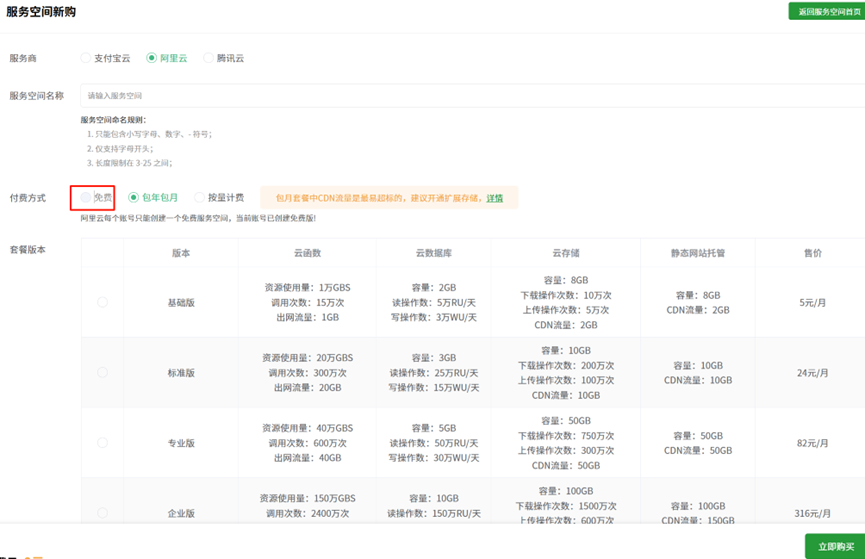
2.2.1 关联云空间

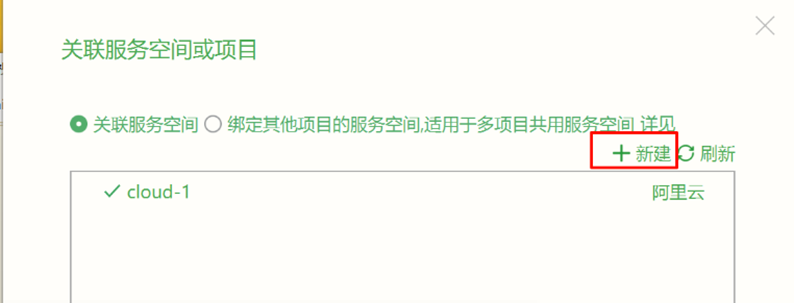

免费空间目前只能申请一个:
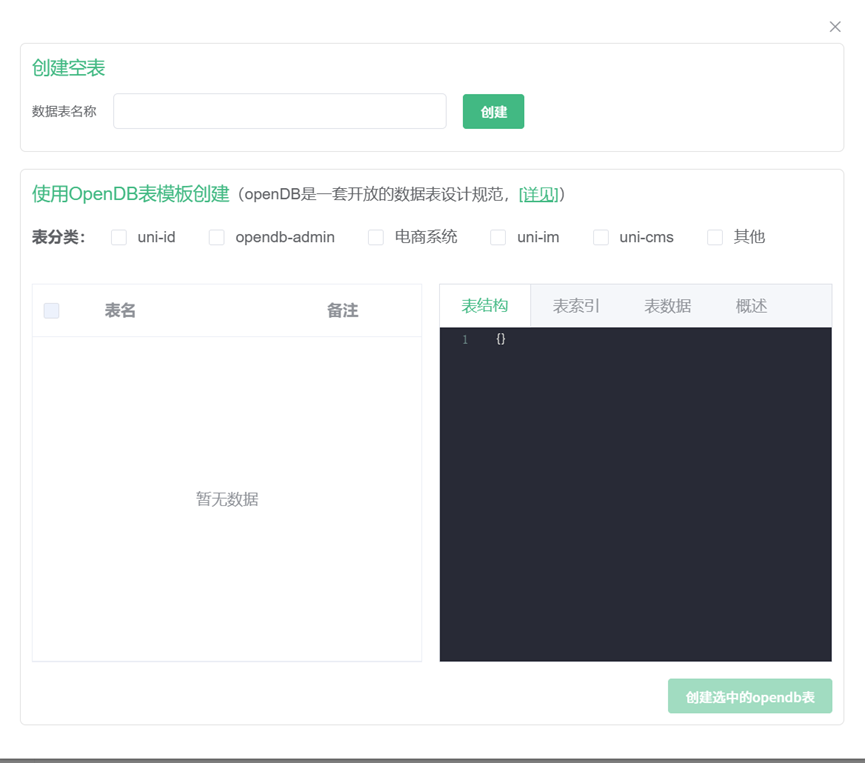
2.2.2 云数据库设置
单击打开服务空间

2.2.2.1 新建忘录表 notes
设置数据库的数据表名称为notes
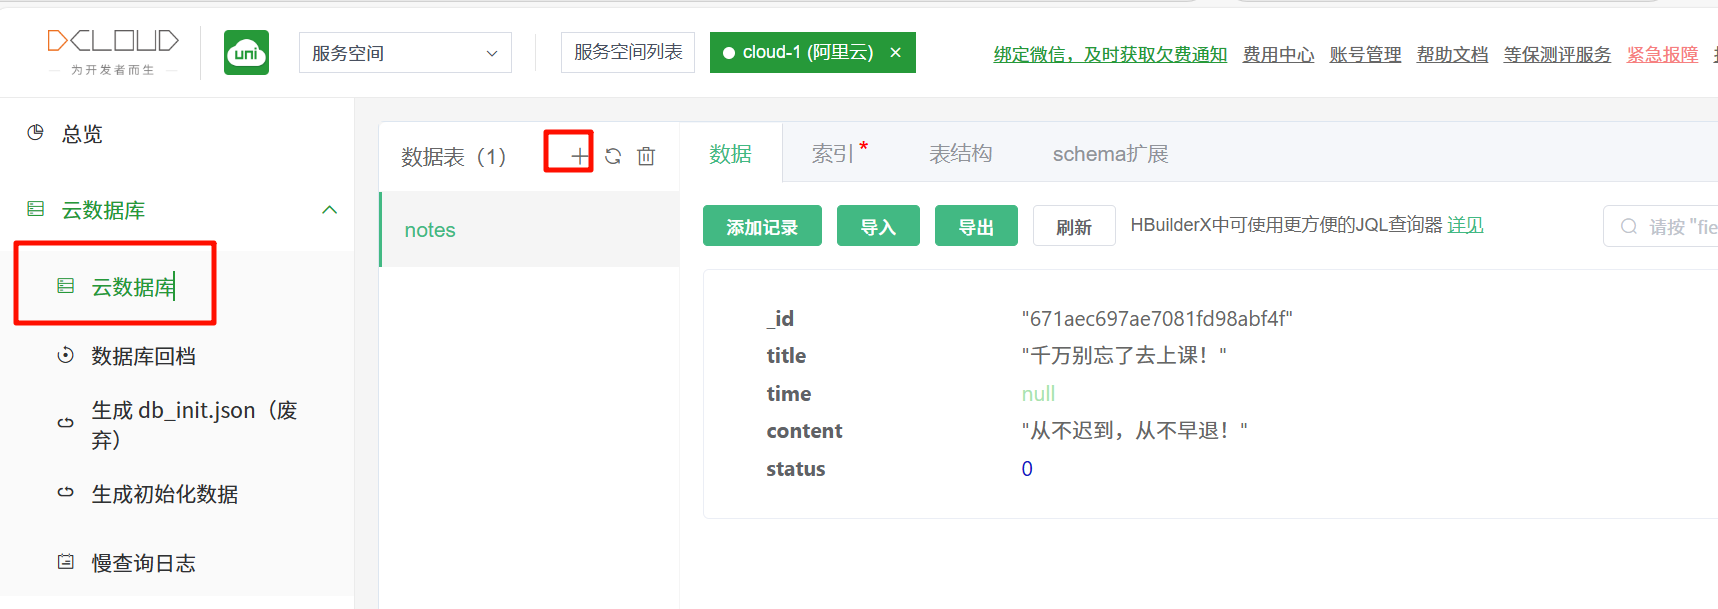
2.2.2.1 添加记录
{
    "title": "千万别忘了去上课!",
    "time": null,
    "content": "从不迟到,从不早退!",
    "status": 0
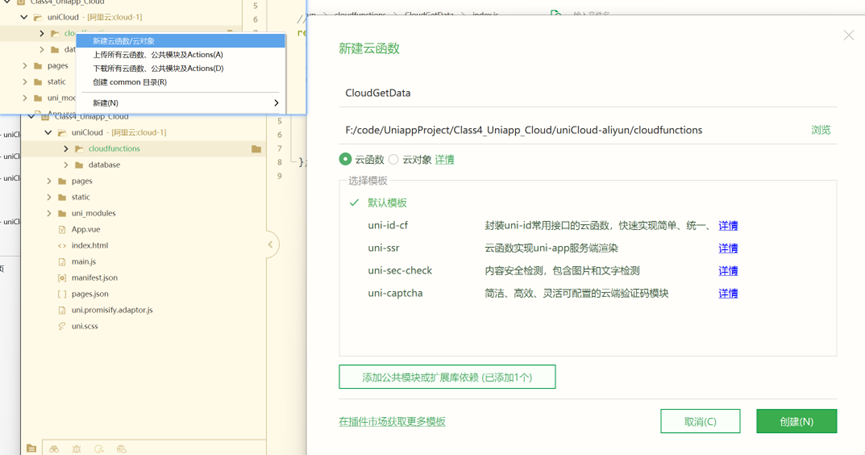
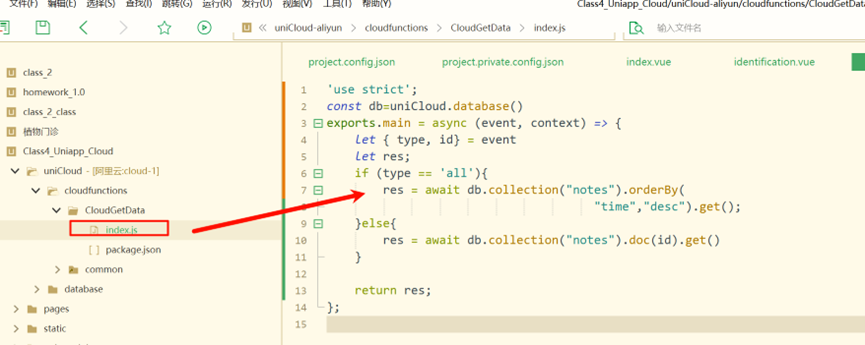
}2.2.3 创建云函数
3 页面设计
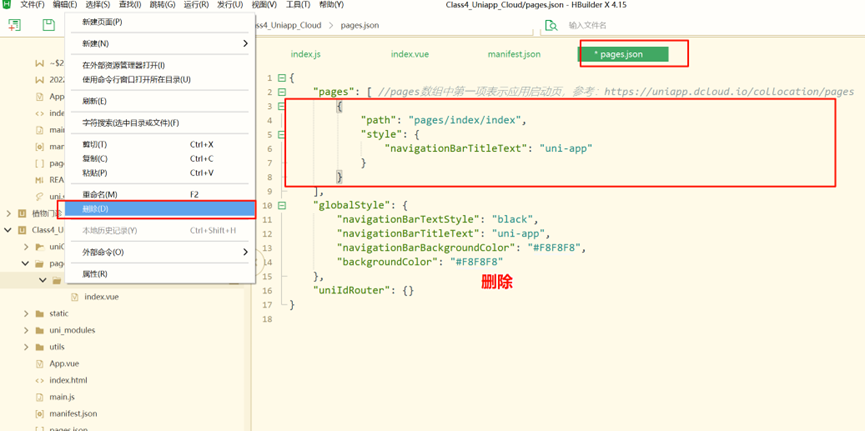
3.1 list 页面
3.1.1 页面设计及配置
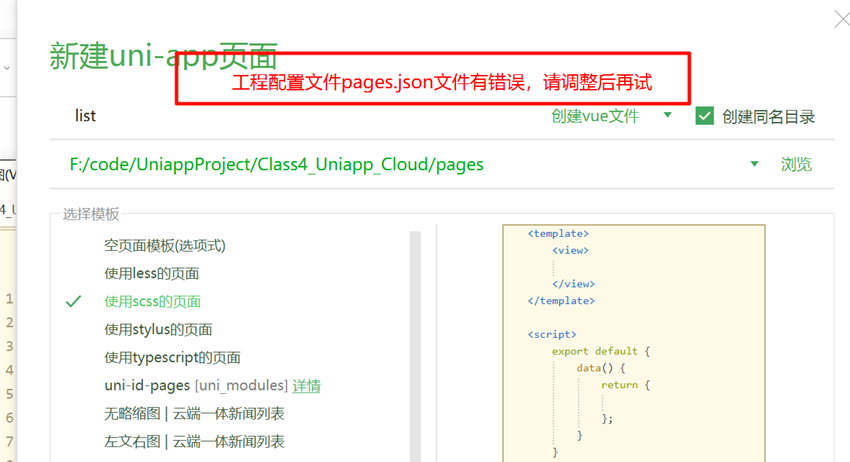
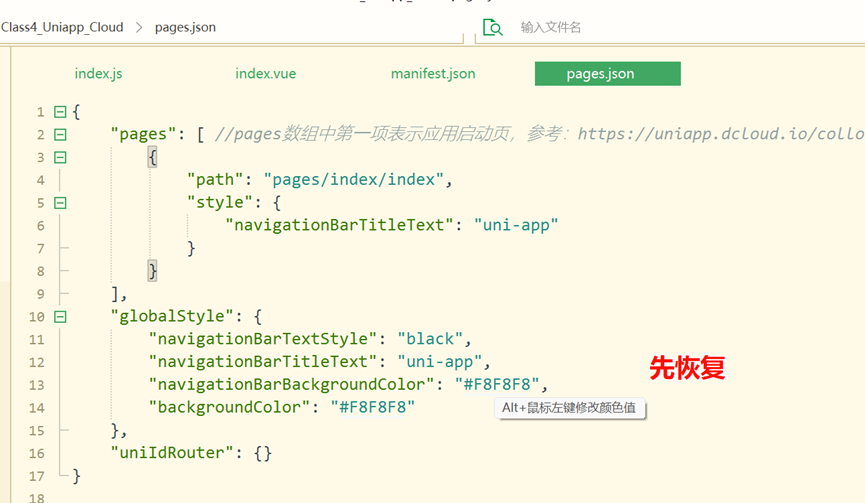
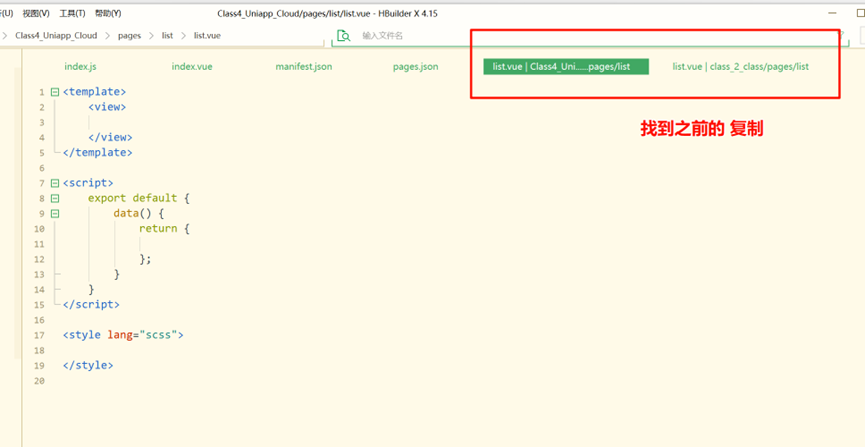
再次新建完成,然后再删除index和相关配置
3.1.2 插件安装
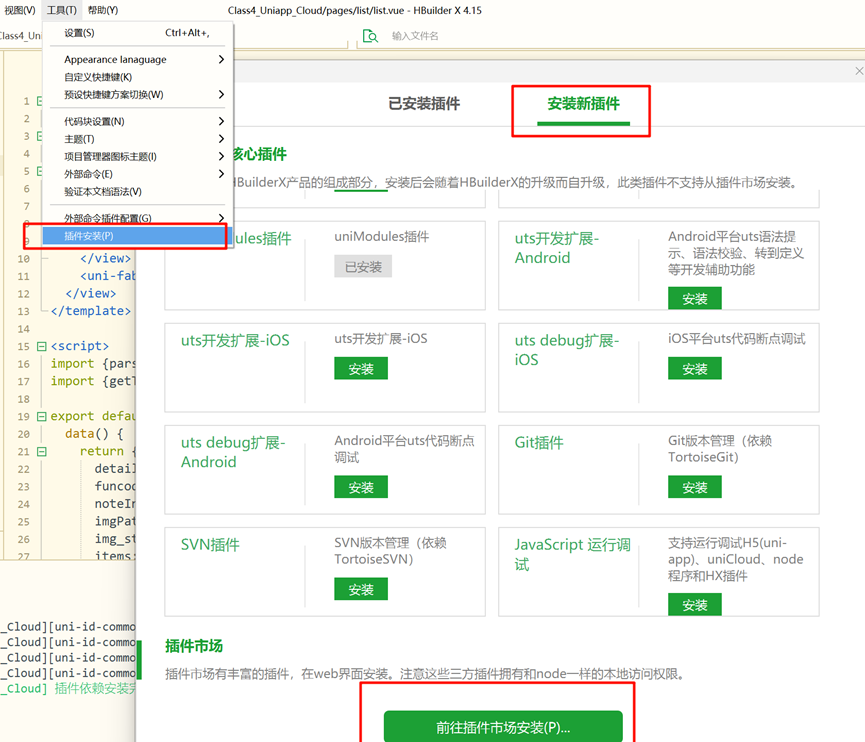
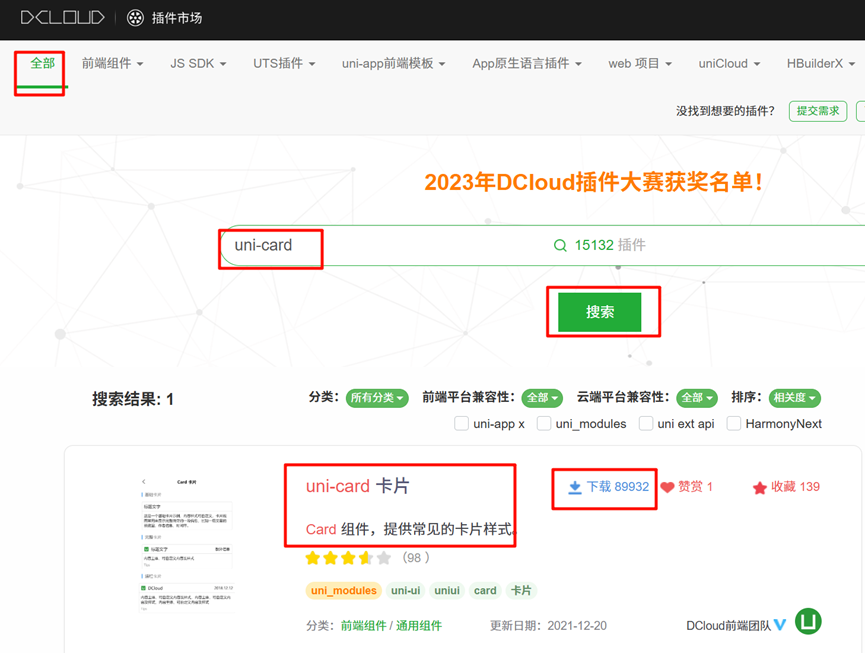
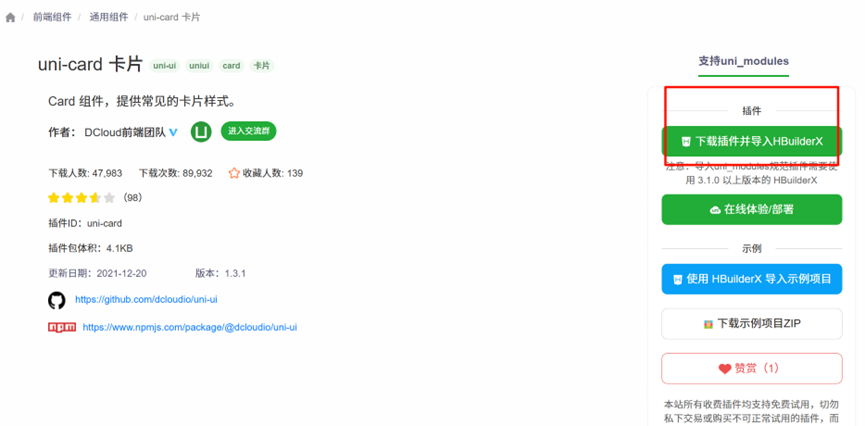
同样的方法,添加uni-forms、uni-fab、uni-easyinput、uni-data-select和uni-nav-bar控件到当前工程中
3.1.3 修改getData方法
//list.vue - methods
getData() {
	uniCloud.callFunction({
		name: "CloudGetData",
		data: {
			type:'all',   //要求返回全部备忘录
			id:"000"      //当type为'all'时候,id无意义
		}
	}).then(res => {
		console.log(res)
		this.items = res.result.data
		for (let index in this.items) {  //for循环每次获得index
			if (!this.items[index].time) {  //但创建时间为空时
				this.items[index].time = Date.now()
			}
			this.items[index].time =  parseTime(this.items[index].time)
		}
	})
}3.1.4 修改pages.json
//pages.json
{
	"pages": [{
            "path" : "pages/list/list",
            "style" :
            {
                "navigationBarTitleText": "",
                "enablePullDownRefresh": false
            }

        }
    ],
	"globalStyle": {
		"navigationBarTextStyle": "black",
		"navigationBarTitleText": "uni-app",
		"navigationBarBackgroundColor": "#F8F8F8",
		"backgroundColor": "#F8F8F8",
		"app-plus": {
			"background": "#efeff4"
		}
	}
}3.2 detail页面
3.2.1 复制之前的代码
<template>
  <view class="container">
    <uni-nav-bar rightIcon="checkmarkempty" :title="detail_titles[funcode]" @clickRight="formSubmit"/> <!-- 按钮点击事件 -->

    <uni-forms ref="form" :rules="rules" :model="noteItem">
      <uni-forms-item class="formItem" name="title" required>
        <uni-easyinput class="titleInput" v-model="noteItem.title" placeholder="输入备忘录标题..."/>
      </uni-forms-item>
      <uni-forms-item class="formItem" name="content" required>
        <uni-easyinput autoHeight type="textarea" v-model="noteItem.content" placeholder="输入备忘录内容..."/>
      </uni-forms-item>
      <view v-if="funcode==1" class="optBox">
        <image class="status-image" :src="imgPath+img_status[noteItem.status]" mode="">
        </image>
        <uni-data-select class="selecter" v-model="value" :localdata="range" @change="change">
        </uni-data-select>
      </view>
      <view  v-if="funcode==1" class="footer">
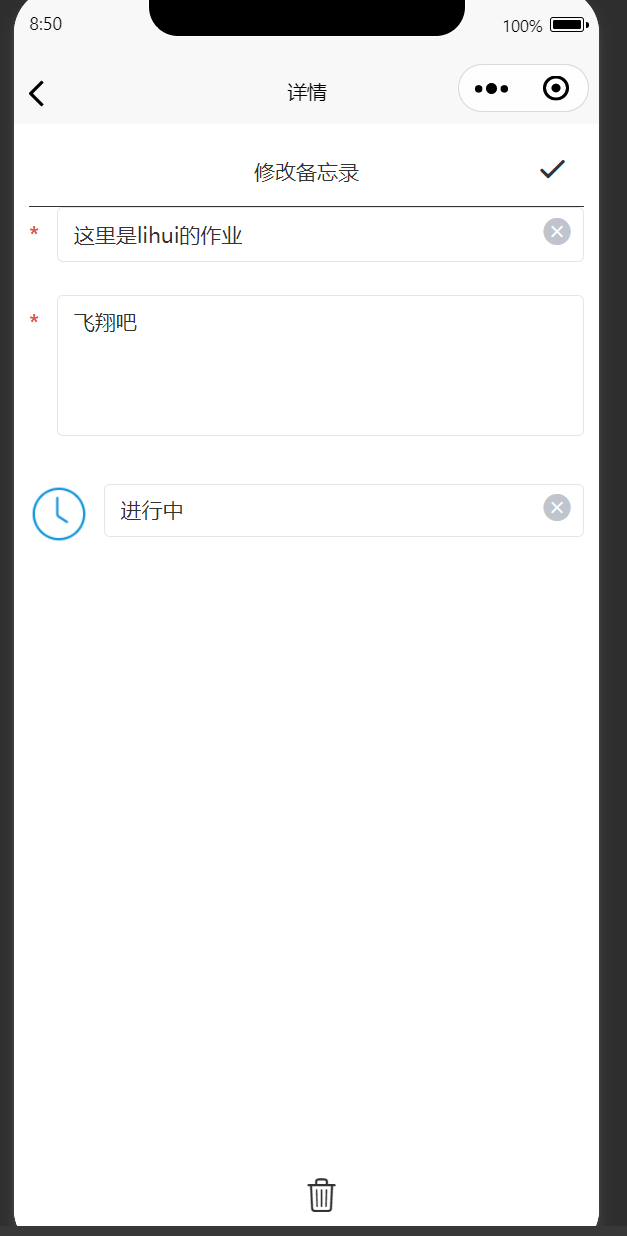
        <uni-icons type="trash" size="30" @click="delNote"></uni-icons>
      </view>

    </uni-forms>
  </view>
</template>


<script>
import {getTheStorage} from "@/utils/common.js"

export default {
  data() {
    return {
      detail_titles: ['新建备忘录', '修改备忘录'],
      funcode: 0,
      noteIndex: -1,
      imgPath: "/static/images/",
      img_status: ["Not-started.png", "in-progress.png", "complete.png"],
      value: 1,
      range: [{
        value: 0,
        text: "未开始"
      },
        {
          value: 1,
          text: "进行中"
        },
        {
          value: 2,
          text: "已结束"
        },
      ],
      noteItem: {
        title: '',
        time: null,   //创建备忘录的事件,保存时记录时再填入
        content: '',
        status: 0,// 默认为0,未开始  //todo
      },
      rules: { // 文本框规则
        title: {
          rules: [
            {
              required: true,
              errorMessage: "请输入备忘录标题!"
            },
            {
              maxLength: 20,
              errorMessage: "标题超过20个字符长!"
            }
          ]
        },
        content: {
          rules: [
            {
              required: true,
              errorMessage: "请输入备忘录内容!"
            },
            {
              maxLength: 200,
              errorMessage: "内容不能超过200字!"
            }
          ]
        }
      }
    };
  },
  onLoad(option) {
    this.funcode = option.funcode;
    if (!(this.funcode in [0, 1])) {
      this.funcode = 0
    }
    if (this.funcode == 1) {
      this.noteIndex = option.index
      this.getTheItemFormStorage()
    }
  },
  methods: {
    setTheStorage(notes,hintMessage) {
      //将参数notes写入缓存
      try {
        uni.setStorageSync("noteList", notes)
      } catch (e) {
        console.log(e)
      }
      uni.showToast({
        icon: "success",
        title: hintMessage,
        duration: 1500
      })
      setTimeout(() => {
        uni.reLaunch({
          url: "/pages/list/list"
        })
      }, 1500)
    },
    formSubmit() {
      this.$refs.form.validate().then(() => {
        var hintMessage;
        this.noteItem.time = Date.now()
        let notes = getTheStorage("noteList");
        if (this.funcode == 0) {
          //新建时,在0位置删除0个记录,并插入新纪录;等同于新纪录插入最前面
          notes.splice(0, 0, this.noteItem); // 将当前数据插入列头
          hintMessage = "增加成功!";  //新增提示赋值

        } else {
          // 修改时,在index位置删除原来1条记录,并在原位置增加新记录
          notes.splice(this.noteIndex, 1, this.noteItem);
          hintMessage = "更新成功!";   //新增提示赋值

        }
        this.setTheStorage(notes, hintMessage)
      }).catch((err) => {
        console.log(err)
      })
    },
    getTheItemFormStorage() {
      let notes = getTheStorage("noteList");
      this.noteItem.title = notes[this.noteIndex].title
      this.noteItem.content = notes[this.noteIndex].content
      this.noteItem.status = notes[this.noteIndex].status
      this.value = this.noteItem.status   //为选择器选择对应的状态
    },
    delNote() {
      uni.showModal({
        content: "确定删除?",
        success: (res) => {
          if (res.confirm) {
            let notes = getTheStorage("noteList");
            notes.splice(this.noteIndex, 1)//删除一条记录
            this.setTheStorage(notes)
          }
        }
      })
    },
    change(e) {
      this.noteItem.status = e
    },

  },

}
</script>

<style lang="scss">
.container {
  padding: 20rpx;
  font-size: 30rpx;
  line-height: 32rpx;
}

.formItem {
  margin: 10rpx 20rpx;
}

.optBox {
  display: flex;
  padding: 20rpx 0rpx 20rpx 0rpx;
}

.status-image {
  // flex: 1;
  width: 40px;
  height: 40px;
}

.selecter {
  flex: 1;
  padding: 0rpx 0rpx 0rpx 20rpx; //上 右 下 左
}

.footer {
  width: 100%;
  text-align: center;
  position: fixed;
  bottom: 50rpx;
}
</style>3.2.2 修改
3.2.2.1 数据noteItem的定义
noteItem: {
	id:'',   //新增,for 云函数记录
	title: '',
	time: null,
	content: '',
	status: 0 // 默认为0,未开始
},3.2.2.2 修改data
根据上面的代码,我们可知,id能唯一区别每条记录,这比使用顺序号index更有优势,因此修改data 部分,增加数据定义noteId,并删除原有的noteIndex的定义,如下代码所示:
data() {
	return {
		detail_titles: ['新建备忘录', '修改备忘录'],
		funcode: 0,
		noteId: -1,  //修改内容,用于保存list.vue中cardClick函数的传值
		//noteIndex: -1,  本条注释掉
       imgPath: "/static/images/",
       //省略
}3.2.2.3 新增getTheItemFromCloud
在method中,删除原来函数getTheItemFormStorage() 的定义,并新增getTheItemFromCloud 函数的定义,如下:
getTheItemFromCloud() {
	uniCloud.callFunction({
		name: "CloudGetData",
		data: {
			type:'one',
			id: this.noteId
		}
	}).then(res => {
		console.log(res)
		let notes = res.result.data;
		this.noteItem.id = notes[0]._id  //返回只有一条记录的集合,so
		this.noteItem.title = notes[0].title
		this.noteItem.content = notes[0].content
		this.noteItem.status = notes[0].status
       //为选择器选择对应的状态
		this.value = this.noteItem.status
	})
},3.2.2.4 修改onLoad
this.getTheItemFormStorage() 替换为:this.getTheItemFromCloud()3.2.2.5 修改list.vue中的传值
// list.vue 页面的method中
cardClick(index) {
    uni.navigateTo({
		url: "/pages/detail/detail?funcode=1&&id=" + this.items[index]._id
	})
},3.2.2.6 再次修改onLoad
在detail.vue页面中,onLoad函数修改为:
onLoad(option) {
    this.funcode = option.funcode;
    if (!(this.funcode in [0, 1])) {
        this.funcode = 0
    }
    if (this.funcode == 1) {
        this.noteId = option.id    //修改
        this.getTheItemFromCloud() //修改
    }
},3.2.3 更新数据
3.2.3.1 添加云函数 CloudUpdateData
'use strict';
const db = uniCloud.database()
exports.main = async (event, context) => {
	let {type,title,content,status,id} = event
	let res;
	let data = {
		'title': title,
		'time': Date.now(),
		'content': content,
		'status': status
	}
	if (type == 'add') {
		res = await db.collection("notes").add(data);
	} else if (type == 'update') {
		res = await db.collection("notes").doc(id).update(data)
	} else if (type == 'delete') {
		res = await db.collection("notes").doc(id).remove()
	}

	return res;
};3.2.3.2 修改 formSubmit()
formSubmit(){
	this.$refs.form.validate().then(() => {
		var hintMessage;
		var theType;
		this.noteItem.time = Date.now()
		if (this.funcode == 0) {
			hintMessage = "增加成功!";
			theType = 'add';
		} else {
			hintMessage = "更新成功!";
			theType = 'update';
		}
		this.setTheStorage(theType, hintMessage)
	}).catch((err) => {
		console.log(err)
	})
}3.2.3.3 修改setTheStorage
setTheStorage(theType, hintMessage) {
	//写入云数据库
	try {
		uniCloud.callFunction({
			name: "CloudUpdateData",
			data: {
				type: theType,
				title: this.noteItem.title,
				content: this.noteItem.content,
				status: this.noteItem.status,
				id: this.noteItem.id
			}
		}).then(res => {
			console.log(res)
		})
    } catch (e) {
		console.log(e)
	 }
	 uni.showToast({
		icon: "success",
		title: hintMessage,
		duration: 1500
	 })
	 setTimeout(() => {
		uni.reLaunch({
		    url: "/pages/list/list"
		})
	 }, 1500)
},3.2.3.4 修改delNote()函数
delNote() {
	uni.showModal({
		content: "确定删除?",
		success: (res) => {
			if (res.confirm) {
				this.setTheStorage('delete', "删除成功!")
			}
		}
	})
},4 优化设计(差异化设计)
4.1 优化方案
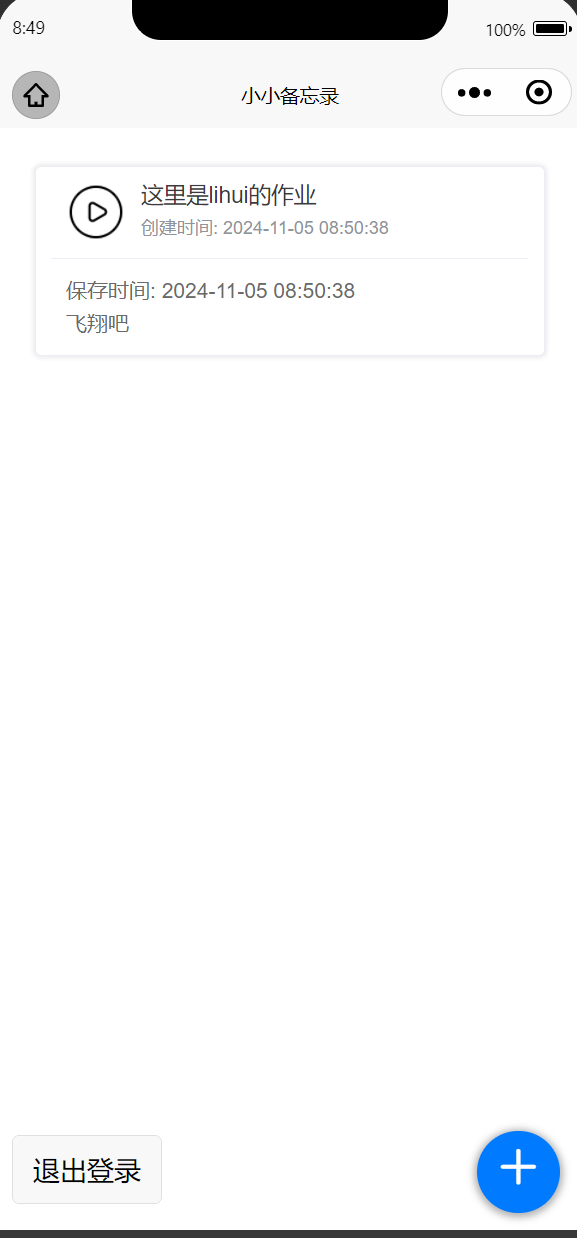
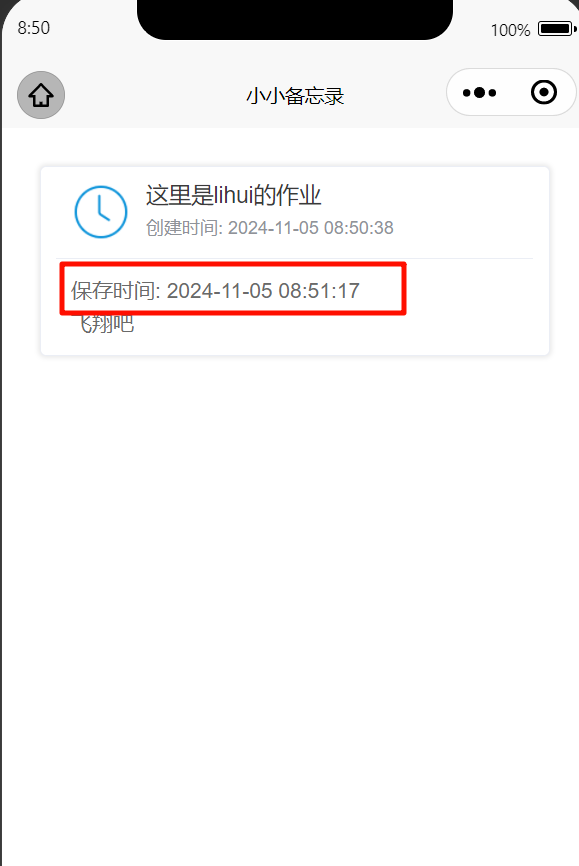
时间更新✅
页面优化
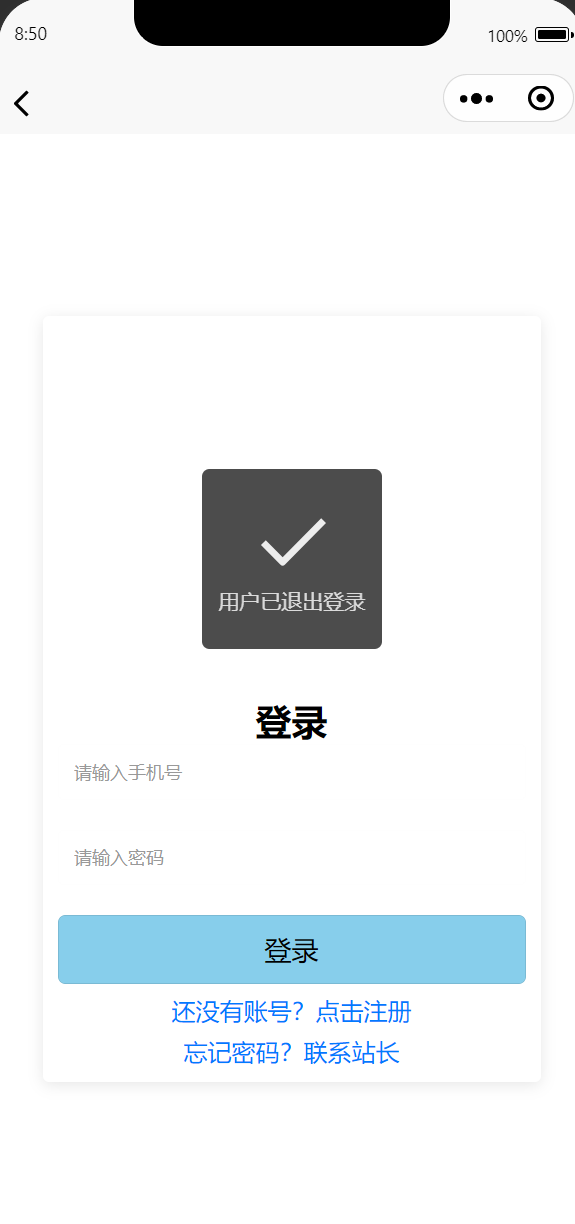
登录界面 ✅
登录 = >传入phone + passwd = >判断 =>进入 ✅
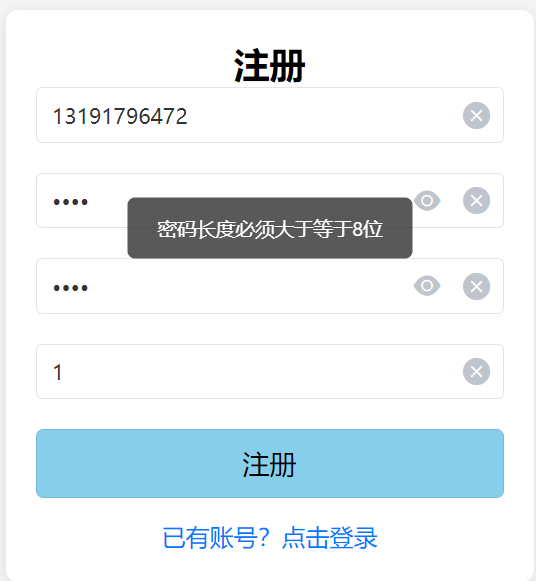
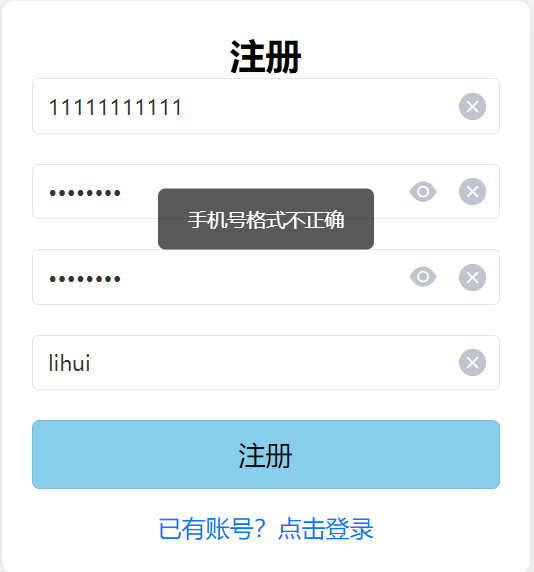
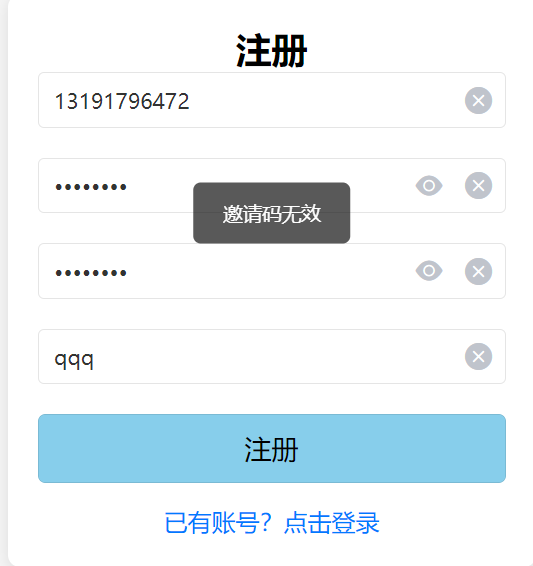
注册页面 =>传入 phone+ passwd+repasswd+邀请码(邀请码固定为lihui)✅
- 手机号、邀请码、密码、确认密码✅
根据userId 存储数据 == > 改为根据phone存储数据
密码修改✅ = >联系站长
密码存储 + js + 云函数 ✅ =>新建用户表
4.2 优化过程
4.2.1 数据库重构
4.2.1.1 分析
为了实现登录、注册、以及备忘录存储,我们需要将每个用户的信息单独存储,或者使用唯一的id进行数据的筛选
账户密码需要一个表,备忘录内容需要一个表,分别新建users、worknotes

4.2.1.2 表结构设计
user:
{
    "phone": "", //用户手机号、账号
    "password": "",//密码,md5加密
    "inviteCode": "",//邀请码,目前仅存储为lihui,可以在js函数修改
    "createdAt": ""//创建时间
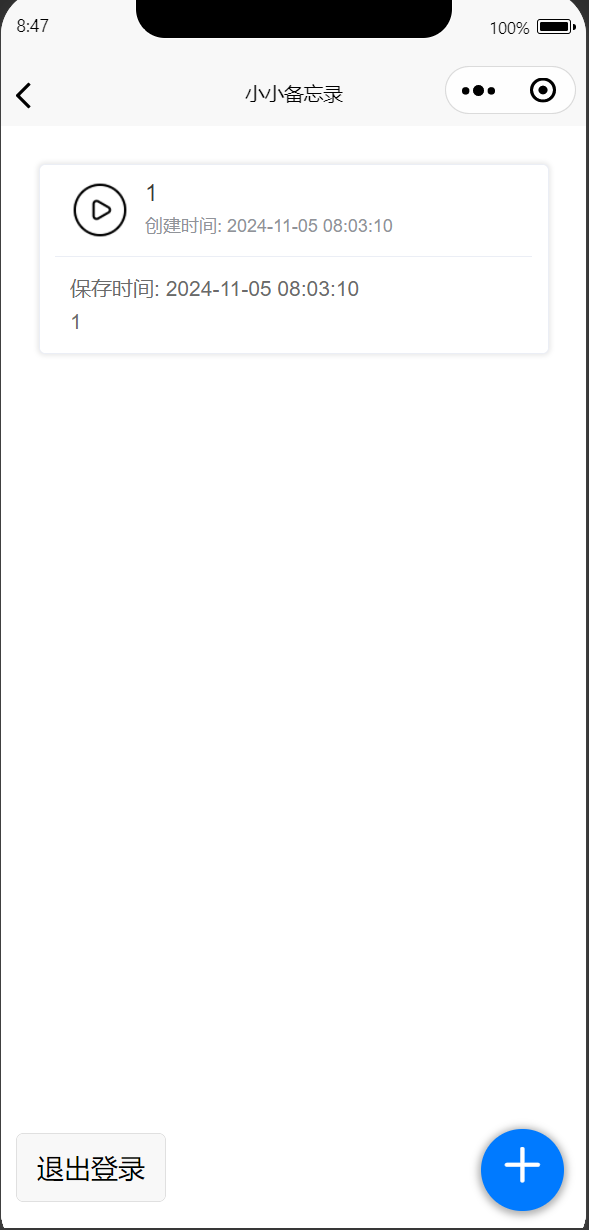
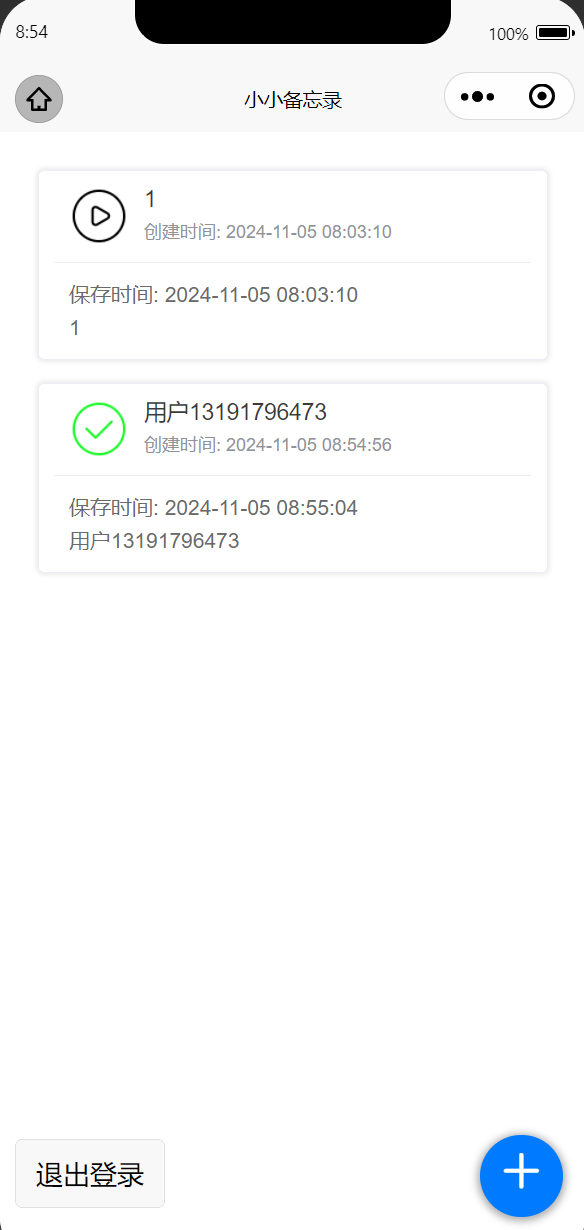
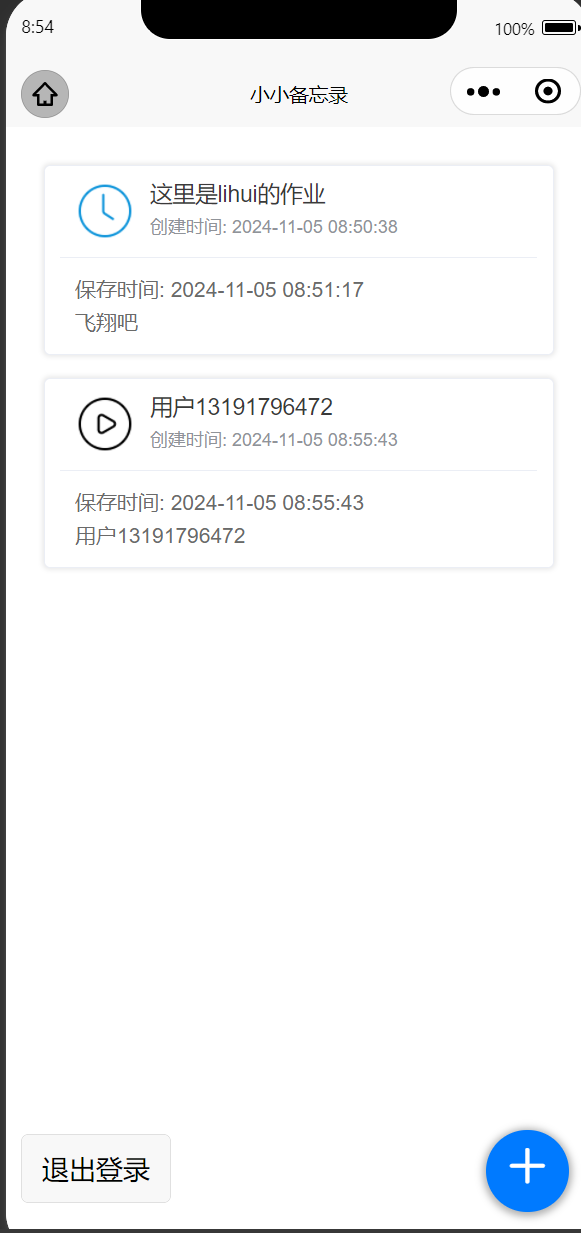
}worknotes:
{
    "title": "",
    "content": "",
    "status": ,
    "phone": "",//用户手机号、账号,用来区分用户
    "creationTime": //创建时间
    "saveTime"://保存时间
}4.2.2 页面修改
4.2.2.1 页面新增
新增 登录、注册界面
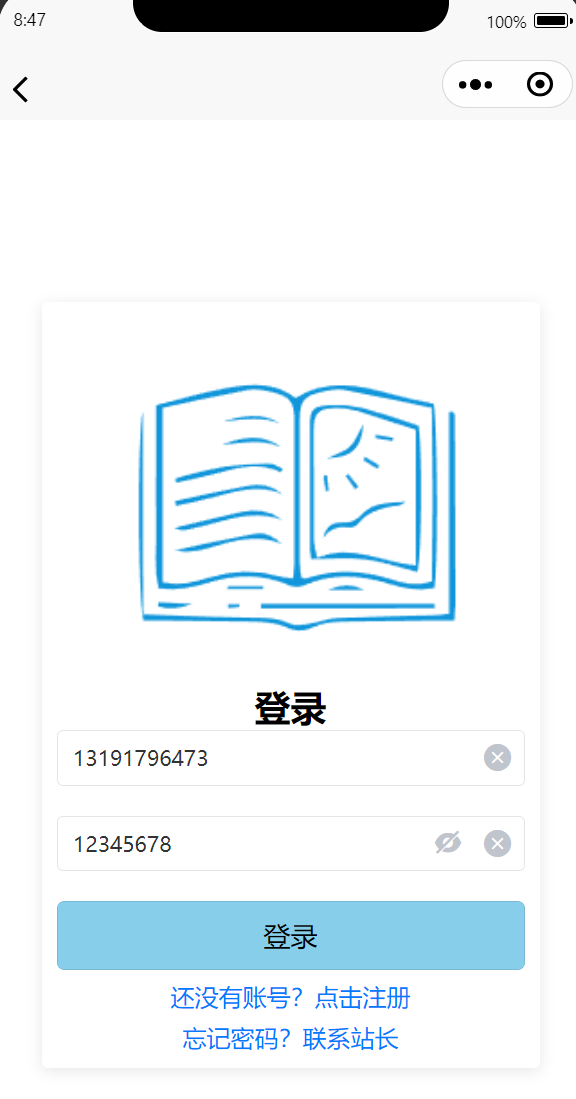
4.2.2.1.1 登录界面
<template>
  <view class="login-container">
    <view class="login-form">
      <image :src="imageSrc" class="logo" mode="aspectFit"></image>

	  <text class="login-title">登录</text>

	  <view class="input">
        <uni-easyinput
            v-model="phone"
            placeholder="请输入手机号"
            class="input-field"
        />
      </view>

      <view class="input">
        <uni-easyinput
            v-model="password"
            placeholder="请输入密码"
            class="input-field"
            type="password"
        />
      </view>

      <button style="background-color: skyblue;" class="login-button" @click="login" type="default">登录</button>

      <view class="register-link">
        <text @click="goToRegister">还没有账号?点击注册</text>
      </view>
	  <view class="admin-link">
	  	<text @click="goToAdmin">忘记密码?联系站长</text>
	  </view>
    </view>
  </view>
</template>

<script>
import md5 from "../../utils/md5.min.js"
let myurl  = 'https://lihuibear.cn'
export default {
  data() {
    return {
      phone: '',      // 存储手机号
      password: '',   // 存储密码
      imageSrc: '/static/images/beiwanglu.png' // 存储图片路径
    };
  },
  methods: {
    login() {
      if (!this.phone || !this.password) {
        uni.showToast({
          title: '请输入手机号和密码',
          icon: 'none'
        });
        return;
      }

      console.log(this.phone, "Phone");
      const md5password = md5(this.password);
      uniCloud.callFunction({
        name: "loginFunction",
        data: {
          phone: this.phone,
          password: md5password
        }
      }).then(res => {
        if (res.result.success) {
          uni.showToast({
            title: '登录成功',
            icon: 'success'
          });
          // 登录成功后保存手机号到本地存储
          uni.setStorageSync('userPhone', this.phone);
          // 跳转到备忘录页面
          uni.navigateTo({
            url: '/pages/list/list'
          });
        } else {
          uni.showToast({
            title: res.result.message || '登录失败',
            icon: 'none'
          });
        }
      }).catch(err => {
        console.error('登录请求失败:', err);
        uni.showToast({
          title: '登录请求失败: ' + err.message,
          icon: 'none'
        });
      });
    },
    goToRegister() {
      uni.navigateTo({
        url: '/pages/register/register'
      });
    },

	goToAdmin() {
      uni.navigateTo({
        url:'/pages/webView/webView?url='+myurl
      });
    },
  }
}
</script>

<style lang="scss">
.login-container {
  display: flex;
  justify-content: center;
  align-items: center;
  height: 100vh;

}

.login-form {
  width: 80%;
  background: white;
  padding: 20rpx;
  border-radius: 8rpx;
  box-shadow: 0 2px 10px rgba(0, 0, 0, 0.1);
}


.login-title {
  font-size: 24px;
  font-weight: bold;
  text-align: center;
  padding-left: 255rpx;
  padding-bottom: 20rpx;
}

.input-field {
  margin-bottom: 15px;
  margin-top: 20rpx;
}

.login-button {
  width: 100%;
  background-color: skyblue;
}

.register-link {
  margin-top: 15rpx;
  text-align: center;
  color: #007AFF;
  cursor: pointer;
}
.admin-link{
  margin-top: 15rpx;
  text-align: center;
  color: #007AFF;
  cursor: pointer;
}

.input {
  height: 110rpx;
}
</style>注册界面类似
4.2.2.2 页面逻辑修改
由于新增了 phone 等字段,需要改以下存储逻辑
    getData() {
      const userPhone = uni.getStorageSync('userPhone'); // 从存储中获取手机号
      uniCloud.callFunction({
        name: "CloudGetData",
        data: {
          type: 'all',
          id: "000",
          phone: userPhone
        }
      }).then(res => {
        if (res.result && res.result.data) {
          this.items = res.result.data;
          this.items.forEach(item => {
            if (!item.time) {
              item.time = Date.now();
            }
            // 设置创建时间和保存时间
            item.creationTime = parseTime(item.creationTime || Date.now()); // 使用现有时间或当前时间
            item.saveTime = parseTime(item.saveTime || Date.now()); // 使用现有时间或当前时间
          });
        } else {
          console.error("未返回数据");
        }
      }).catch(err => {
        console.error("获取数据时出错:", err);
      });
}其他不在赘述
4.2.2.3 页面跳转
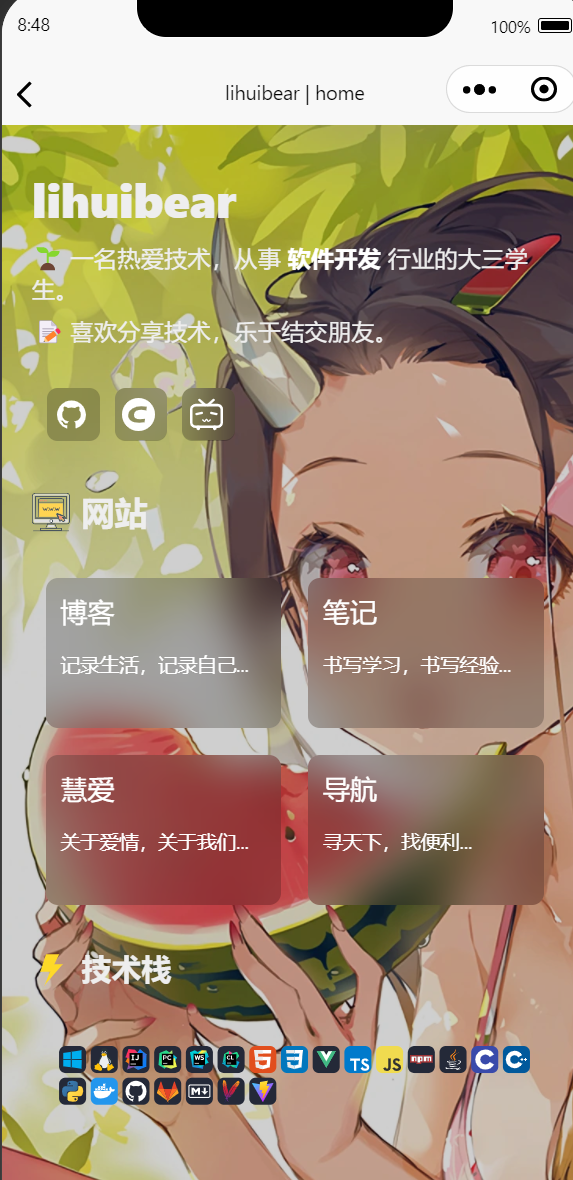
在修改密码时间,直接联系站长,跳转到我的主页
4.2.3 逻辑修改(云函数)
4.2.3.1 密码加密
插件商城搜md5,安装,复制js_sdk\js-md5\build\md5.min.js到utils目录下
4.2.3.2 云函数
新增和修改云函数,只展示一个
'use strict';
const db = uniCloud.database();

exports.main = async (event, context) => {
	// 获取客户端上传的参数
	const { phone, password } = event;

	// 检查输入的参数
	if (!phone || !password) {
		return {
			success: false,
			message: '手机号和密码不能为空'
		};
	}

	try {
		// 在数据库中查找用户
		const userRes = await db.collection('users')
			.where({ phone: phone })  // 根据手机号查找
			.get();

		// 检查用户是否存在
		if (userRes.data.length === 0) {
			return {
				success: false,
				message: '用户不存在'
			};
		}

		const user = userRes.data[0];

		// 验证密码(这里假设密码是明文存储,实际应用中应使用加密存储)
		if (user.password !== password) {
			return {
				success: false,
				message: '密码错误'
			};
		}

		// 登录成功,返回用户信息(可以选择返回 token 或其他信息)
		return {
			success: true,
			message: '登录成功',
			userInfo: {
				id: user._id,
				phone: user.phone,
				// 可以添加更多用户信息
			}
		};
	} catch (error) {
		console.error('登录过程中发生错误:', error);
		return {
			success: false,
			message: '登录失败,请稍后再试'
		};
	}
};5 界面展示
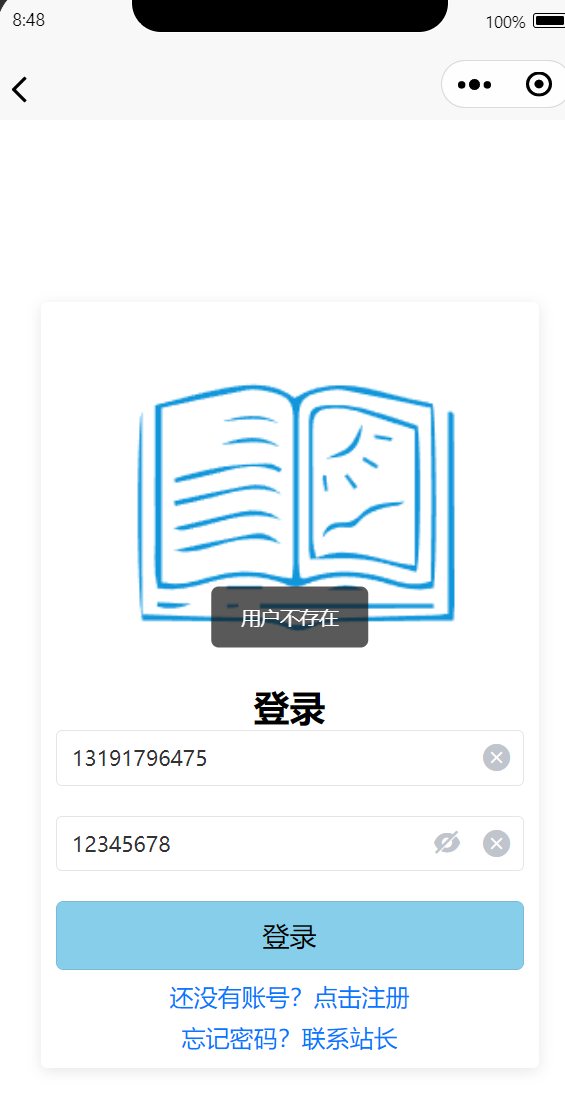
5.1 登录界面
 |  |  |
 |  |
5.2 注册界面
 |  |  |
 |
5.3 备忘录界面
 |  |  |
 |  |  |